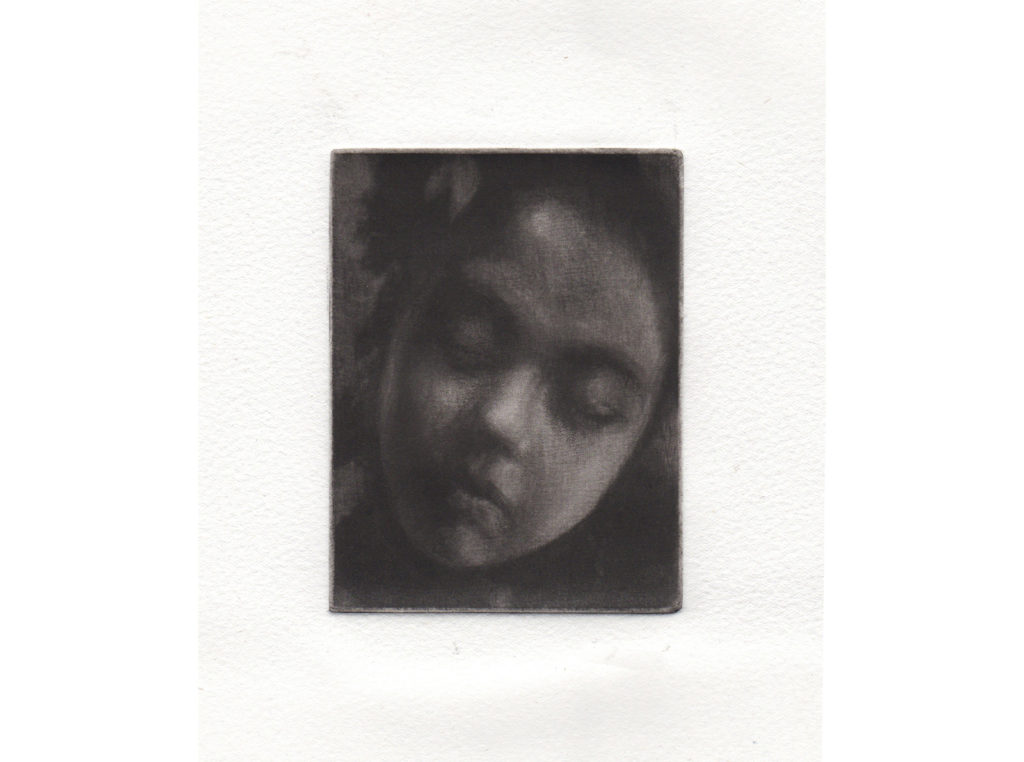
First Mezzotint
I just finished a workshop course at the Manhattan Graphics Center learning the art of mezzotint with a great teacher, Frederick Mershimer. An amazing technique, mezzotint is the ultimate in lo-tech. Here’s my first production: “Sleeping Isabella,” 4 x 3 inches.
Upon embarking on this course, I knew nothing about the procedure, and must confess, was bowled over by its very primitive and exhausting technical demands. Seems the process was developed in the first half of the 17th century. It was used primarily to create black and white reproductions of paintings.
In our class, most of us newbies worked on tiny plates, and thank heavens we did, because the first step involves the use of an instrument called a rocker, which is a curved blade with lots of little teeth (mine had 65 per inch). It’s attached to a wooden handle. You literally “rock” this blade in very small increments across your copper plate, advancing it with each stroke only a teeny-tiny bit. Then you move it over very slightly to the side, and continue another row. We were advised to complete the procedure in 16 different directions!
It took me six hours of endless rocking and rolling.
One theory has it that way-back-when, as mezzotints were first developed and became very popular and expensive, a great many artists wanted to do them. Since “rocking” was so tedious, they hired members of the destitute underclass (and often even children) to spend long days doing nothing but preparing the copper plates, going back and forth, back and forth ad infinitum.
Guess what? They went a little nuts. And that may well have been the origin of the term “off your rocker”!!!
Maybe apocryphal, but entirely credible.
After your plate is thus pitted with gazillions of tiny holes, the sticky-outy parts, or burrs, are gently rubbed down in small increments with a burnishing tool. There are a few other instruments, too, for different possibilities, like a scraper (just what the name implies), a roulette (a little wheel with teeth for going back into burnished areas to put back some gentle pits), and even very fine sandpaper.
If you were to ink and print the untouched rocked plate, you’d wind up with solid black. And what a gorgeous, rich black! But of course, as you slowly burnish away the burrs, you’re creating more and more lights.
One very frustrating part of all this is the difficulty of seeing what you’re actually doing. We’re accustomed to drawing in black on white, or white on black. No mystery there. But with scraped-away copper, your darks are just matte copper, your lights are shiny copper, with multiple degrees in between.
For “Sleeping Isabella,” the first actual print was a huge disappointment. I suppose if someone really knew what they were doing, there’d be no surprises. But my first print was a ridiculous affair, featuring all sorts of scratches, scribbles, darks that should be light, lights that should be dark, etc. But now, at least, upon revisiting the plate, it was possible to make actual corrections. Which started to be, of all things, fun!
I bought three more copper plates. All the same size, 3 x 4 inches. Who knows what will become of them?
